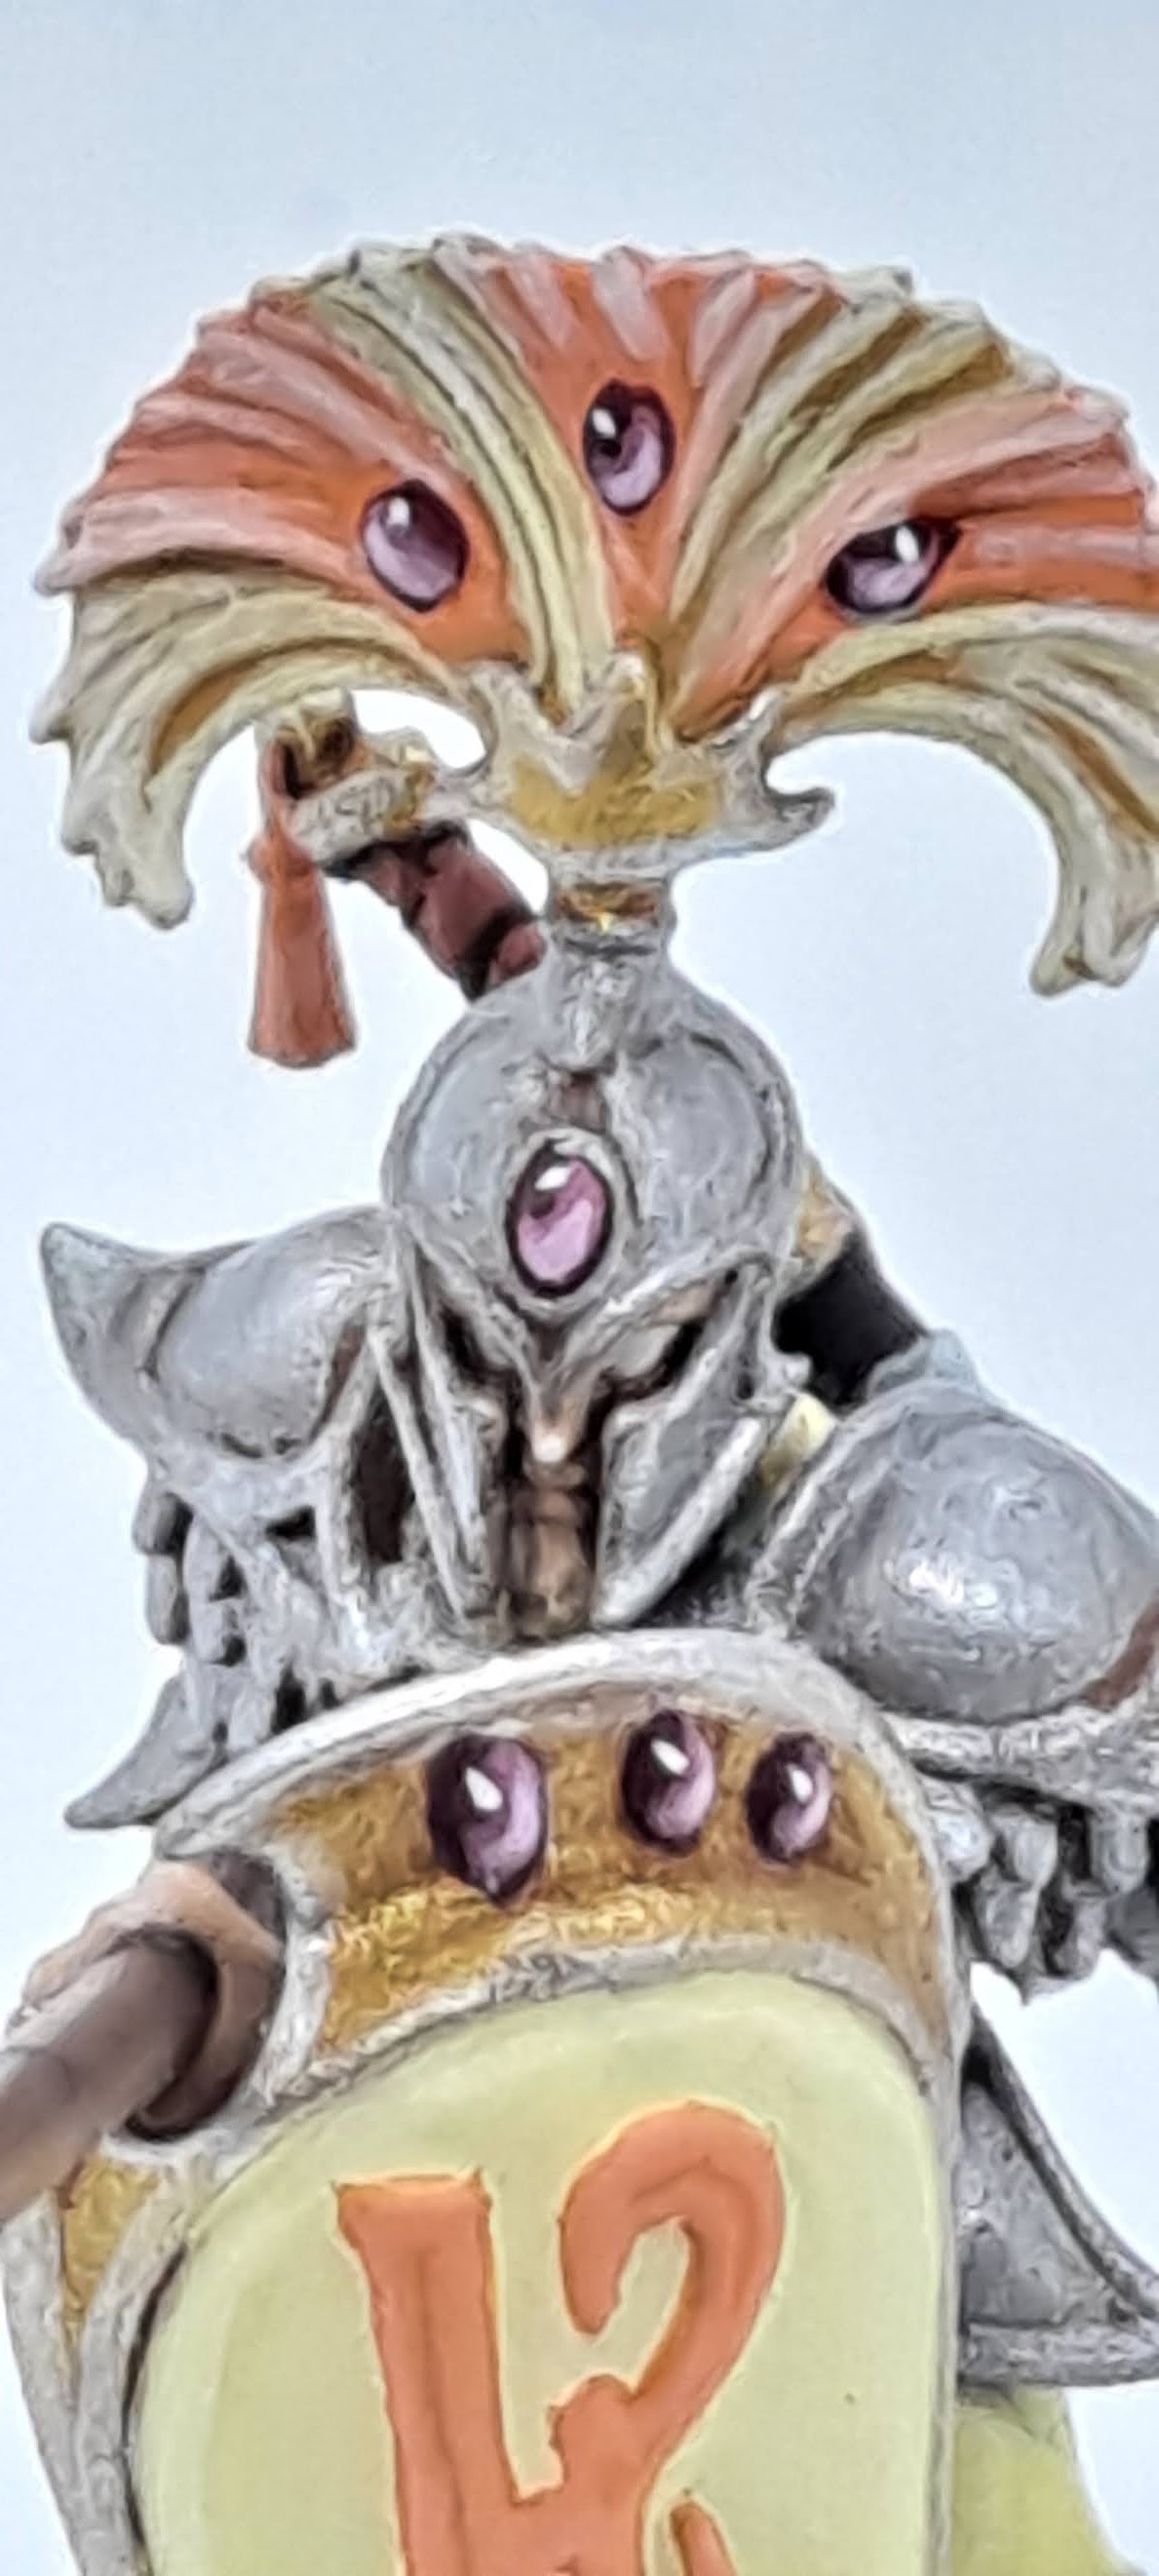
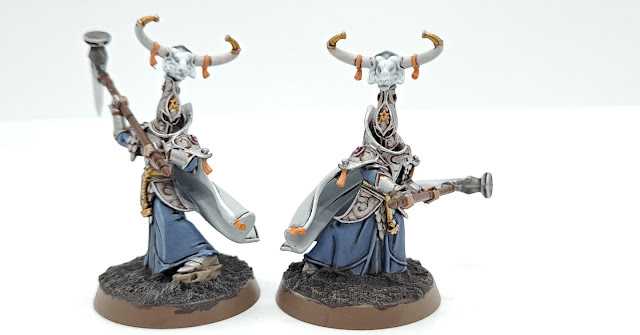
Hi all it's Neil here with a post that is going to link with an upcoming series. I've decided to do a new Lumineth force for the imminent version 3 of Age of Sigmar and thought I'd document my painting steps mostly for myself but so that it's out there if anyone wants to copy (I'd be flattered if you did). So here is the finished Vanari Warden to show the steps for this section of my Lumineth Realmlords force.


This painting guide has been broken down into "feature" areas, to try and make it modular across the different Vanari models available to the Lumineth. Each feature has a title which gives an idea as to what exactly it applies to but if you are using this and aren't sure feel free to ask in comments if you want my help. I hope you find this useful :)
Yellow cloth
1. Base coat with Averland sunset

2. Layer with Dorn Yellow leaving Averland Sunset showing in the recesses

3. Highlight with a 50:50 mix of Dorn Yellow and White Scar

4. Fine highlight with White Scar

5. Glaze with a 30:70 mix of Dorn Yellow and Contrast Medium

6. Highlight again as step 4

Orange Cloth and Tassels
1. Base coat with Fire Dragon Bright

2. Layer Luggnard Orange

3. Highlight 50:50 mix of Luggnard Orange and White Scar

4. Fine highlight with White Scar

Leather
1. Base with Dryad Bark

2. Wash with Agrax Earthshade

3. Highlight with Gorthor Brown

4. Highlight with Baneblade Brown

Armour
1. Base with Leadbelcher

2. Wash with Fuegan Orange

3. Layer with Ironbreaker

4. Highlight and layer with Stormhost Silver

Gold
1. Base with Retributor Armour

2. Wash with Reikland Fleshshade

3. Layer with Auric Armour Gold

4. Highlight with Stormhost Silver

White cloth
1. Base with Celestra Grey

2. Layer with Ulthuan Grey

3. Layer with White Scar

Orange Hilt Grip
1. Base with Squig Orange

2. Wash with Agrax Earthshade

3. Layer with Squig Orange

4. Highlight with 50:50 mix of Squig Orange and White Scar

Aelf Flesh
1. Base with Rakarth Flesh

2. Wash with Reikland Fleshshade

3. Layer with Kislev Flesh

4. Highlight with Flayed One Flesh

Wood
1. Base with Mournfang Brown

2. Wash with Nuln Oil

3. Relayer with Mournfang Brown

4. Highlight with Deathclaw Brown
Blades
1. Base with Leadbelcher

2. Wash any non bladed parts with Nuln Oil

3. Wash tip most 3rd with Casandora Yellow

4. Wash middle 3rd with Fuegan Orange with a small over lap with the Casandora

5. Wash Hilt most 3rd with Carroburg Crimson with a little overlap with the Fuegan. This may need two coats to get a good colour.

6. Thick highlight with Ironbreaker

7. Highlight with Stormhost Silver

Headdress
1. Base with Averland Sunset

2. Base stripes with Fire Dragon Bright with each Aetherquartz piece at the centre of one

3. Highlight Orange with Luggnard Orange

4. Highlight Yellow with Dorn Yellow

5. Highlight Orange with 50:50 mix of Luggnard Orange and White Scar (No longer used)

6. Highlight tips with a little White Scar (No longer used)

Shield Face
1. Base with Dorn Yellow. This will take quite a few layers to get a good colour.

2. Highlight with a 50:50 mix of Dorn Yellow and White Scar around the edge of the yellow area

3. Base the large embossed rune with Fire Dragon Bright

4. Highlight with Luggnard Orange

Aetherquartz Gems
1. Base with Grey Seer

2. Base with Screamer Pink

3. Layer with Emperors Children leaving a bit of Screamer Pink visible in places

4. Do a strip of Fulgrim Pink for a reflective area

5. Do a dot of White Scar opposite the Fulgrim Pink


No comments:
Post a Comment